01 Jun
Heating | Smart Thermostats
Leeds - LS13
Enquiry from: David P
Start Date: Immediate
New cm927 stat pairing / syncing with existing receiver
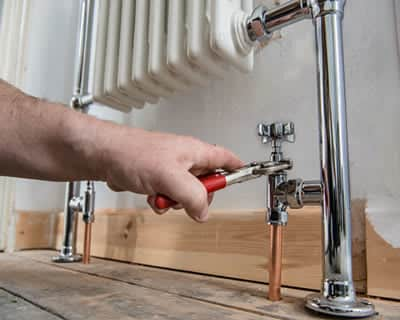
Managing the way your home is heated is among the better ways to lessen pricey energy bills and leave you with more disposable income at the end of each month. Of course, 60% of your power bill is from heating your house, so it's certainly a great starting point.
With the proper controls you'll be able to keep your property at a comfy temperature, whilst at the same time not losing extra money on fuel. You'll likewise be able to keep your house carbon dioxide emissions down too.
The good news is, home heating control systems may be used with any central heating boiler, no matter the design or even age. This suggests there's a saving to be made if you just go out there and get it.
By putting in a heating control system you will save between £70 and £150 yearly. On top of this there are plenty of CO2 emissions to be lowered as well and you can slash between 310kg and 630kg each year.
Also look at the temperature you have your thermostat set on. By just turning it down only one degree, you can save approximately £75 a year and won't feel a difference in temperature either.
The typical cost of Heating control system is £300. Costs differ based upon the materials and the tradesman selected. The upper price range can be as high as £345. The material costs are normally about £75
| Avg. price low | Avg. price low |
|---|---|
| Avg. price | Avg. price |
| Avg. price high | Avg. price high |
£500
£375
£250
£125
£0
| Labour cost | £210 | |
| Material cost | £75 | |
| Waste removal | £15 |
Requests for quotations in West Yorkshire in March 2025
Requests for Heating control system quotations in West Yorkshire in March 2025. 167% change from February 2025.
Requests for Heating control system quotations in Yorkshire & Humber in March 2025. 166% change from February 2025.
We recorded 57,547 requests for home improvement prices in West Yorkshire. Of such quotation requests the amount of heating control systems was 144. Quotatis was able to match these clients with up to four suitable experts who had been available for work within West Yorkshire back then.
Source: Numbers calculated based on the search volumes in major search enginesRequests for quotations in Leeds in March 2025
Requests for quotations in Bradford in March 2025
Requests for quotations in Huddersfield in March 2025
Requests for quotations in Elland in March 2025
Requests for quotations in Heckmondwike in March 2025
Leeds - LS13
Enquiry from: David P
Start Date: Immediate
New cm927 stat pairing / syncing with existing receiver
Wakefield - WF3
Enquiry from: John W
Start Date: Immediate
replace a danfoss thermostat with hive system. this is a assisted living center and the apartments are fed from a main plant room via a heat interface unit in the apartments. age of boiler: 0-5 years ...
Keighley - BD20
Enquiry from: Barry L
Start Date: Immediate
A hives thermostat Current thermostat on remeha combi boiler has failed . Would like to replace with a hives smart thermostat
Ilkley - LS29
Enquiry from: Colin G
Start Date: Immediate
hi i would like a quote to supply and fit a hive smart thermostat. we have a worcester bosch combi boiler that is 18 months old. thanks colin green are you the property owner: owner of the property a...
Leeds - LS19
Enquiry from: Emma A
Start Date: Immediate
purchase and install a hive are you the property owner: owner of the property age of boiler: 6-10 years is your boiler: gas house type: terrace how many bedrooms do you have: 1-2 bedrooms please call...
Leeds - LS13
Enquiry from: Andrew H
Start Date: Immediate
Installation of a hive active heating thermostat on a vokera easi heat plus 25c
Castleford - WF10
Enquiry from: Jack Y
Start Date: Immediate
Hive system supplying and fitted on combi boiler
Ilkley - LS29
Enquiry from: Sean S
Start Date: Immediate
The fitting of a Hive thermostat to a one year old combi boiler
Wetherby - LS22
Enquiry from: Riaz T
Start Date: Immediate
installation of a hive system for heating and hot water are you the property owner: owner of the property age of boiler: 0-5 years is your boiler: gas house type: detached how many bedrooms do you hav...
Keighley - BD20
Enquiry from: Geoff T
Start Date: Immediate
Replace Myson dual valve thermostat wit a dual hive system
Keighley - BD20
Enquiry from: Geoff T
Start Date: Immediate
I have dual zone system two years old and want to change to a hive system which i have loved before
Wakefield - WF3
Enquiry from: David B
Start Date: Immediate
Hi, need Hive fitting to boiler with thermostat and hub
Huddersfield - HD3
Enquiry from: Howard H
Start Date: Immediate
supply and fit hive multizone to existing hive installation are you the property owner: owner of the property age of boiler: 6-10 years is your boiler: gas house type: detached how many bedrooms do yo...
Shipley - BD18
Enquiry from: Christopher S
Start Date: Immediate
install n*** gen wall thermostat and heat link if required on a worcester combi boiler are you the property owner: owner of the property age of boiler: 6-10 years is your boiler: gas house type: terr...
Halifax - HX2
Enquiry from: JEAN O
Start Date: Immediate
My radiator in my bedroom will not heat up
Wakefield - WF4
Enquiry from: Gary C
Start Date: Immediate
replace 3 single panel radiators to existing system are you the property owner: owner of the property age of boiler: 6-10 years is your boiler: gas house type: semi detached how many bedrooms do you h...
Wakefield - WF1
Enquiry from: Stephen F
Start Date: Immediate
replace 2 existing wired thermostats with 2 nest learning thermostats new build house so boiler is modern easy access to boiler in cupboard address is 6 staithes road, wakefield *** are you the prope...
Huddersfield - HD2
Enquiry from: Ranjit U
Start Date: Immediate
install hive active plus (hub, thermostat and receiver), also an additional multi zone(thermostat and receiver), 10 trv on radiators. we have a water tank on the first floor landing are you the proper...
Wakefield - WF2
Enquiry from: Stuart Y
Start Date: Immediate
supply and fit hive thermostat in next 2 days are you the property owner: owner of the property age of boiler: 0-5 years is your boiler: gas house type: terrace how many bedrooms do you have: 3-4 bedr...
Shipley - BD18
Enquiry from: Christopher R
Start Date: Immediate
i think i have a thermostat problem as my boiler will not fire up from the room are you the property owner: owner of the property age of boiler: 10+ years is your boiler: gas house type: terrace how ...
Answer a few quick questions, so we can match you with local heating engineers who can help.
Get free, no-obligation local heating control system quotes from 4 verified heating engineers working in West Yorkshire.
Compare customer reviews, services and prices, and choose the right tradesperson for you.
Would highly recommend, they found me a firm which I was happy with a quote they give me and went ahead and had my job done within 2 days of enquiring.
Good easy way to find a selection of trades you need all in one place.
Love LeadsDoWork it's a big part of my Business I would recommend to anyone
In recent times, home and property owners are constantly looking for ways in which to enhance both energy efficiency and sustainability especially as the world draws closer and closer to energy-efficient technology. The Nest thermostat is a great example of this fact as its designed in such a way to save energy while also cutting heating and cooling costs. And an interesting fact is, you’re not limited to using just a single Nest thermostat in your home as multiple of the device can successfully run together to maintain a consistent level of temperature monitoring as well as energy efficiency. What’s more? You can add up to 20 Nest thermostat and 18 temperature sensors in a home.
It’s very unlikely that you’re going to need this many thermostats in your home, but if you’d like to add a second the process is quite straightforward. However, we’d recommend you employ the services of a seasoned professional especially if you lack the required training or experience to pull this off to save yourself some time and money.
To get started, simply download the associated Nest app to add Nest devices. Now let’s have a look at the processes involved in adding a second Nest thermostat to your home.
• Open the app.
• Go to the top left corner of the main screen and click on the menu button.
• Pick the location or home you’re adding the device to.
• Go to the top right corner and select the “settings.
• Once done, then click on the Add Product “Plus button.
Upon a successful addition of the second thermostat, the app will guide you through the initial set up steps. Google also offers a very helpful guide if you’re unfamiliar with the initial configuration.
The Hive thermostat stand is relatively easy to install, however if you lack the necessary training or experience, this is a task you might want to leave to a professional to guarantee the best result while also saving you money and time. This guide will give you a good insight into the Hive thermostat installation process.
The installation of a Hive thermostat does require it to be connected to your home boiler. For this reason we always recommend you get a professional to install it. However once install the Hive Smart Thermostat is very easy to operate and move the controller around your home. To get started, you can follow these steps:
• Press the lever at the lower side of the thermostat and pull away from the front to detach the back plate of your device.
• Once done, simply hang the thermostat on the stand back plate and ensure it holds firmly in place
When it comes to Hive thermostat installation, you might also want to consider the positioning of the device in such a way to heat your home even more efficiently as its designed to be very sensitive to temperature. To identify the best spot for your Hive thermostat, let’s take a look at some of the dos and don’ts.
A Few Dos:
• Do maintain the position of your Hive Thermostat to keep a stable connection with the receive and Hive Hub.
• Do ensure that the position chosen is the centre of your home or a frequently used room.
• Do place the thermostat about 1 to 1.5 metres from floor.
• Do ensure that your thermostat is in a close proximity with the hub and receiver for a better functionality.
A Few Don’ts:
• Don’t place your Hive thermostat stand close to radiators, direct sunlight or other heat sources,
• Don’t position your device near or at places that can expoerience a sudden change in temperature such as the front or back door.
• Don’t leave your thermostat too close to curtains or ornaments.
If you’re looking to acquire smart thermostats in your home, but wondering about its money saving qualities, then this is for you! Not only do smart thermostats add new impressive features to your home, but it can also save you both energy and money. According to many reports using a programmable thermostat can save you between the range of £130 to £150 on an annual basis. Now think about using a smart thermostat that makes it a lot more easier for you.
Wondering how smart thermostat save money? Simply set your smart thermostat one or two degrees lower or higher than the usual number. Once done, you’re likely to notice 1% to 3% reduction in your energy bills. And if you want even more, you simply increase the percentage to about 10 degrees to 15 degrees to cover the period you spend at work and watch as you save up to 10 percent of your energy bills.
Generally, a smart thermostats will save you money in two major ways. These includes:
• They Do All The Thinking For You
The smart thermostat watches your behaviour and study the time you’re at home and when you’re not as well as your preferred temperature at particular times in a day, and that’s why they are termed as “smart. they’ll automatically adjust the settings to ensure you get home to a perfect temperature.
• They Keep Tabs On Your Usage
You can always count on a two way communicating smart thermostat to watch your usage while also collecting the data and sharing it with you. It informs you of your energy usage rate as well as the estimated amount. Once you’ve been notified, you can manual adjustment or leave it to the thermostat to help manage your energy.
The short answer to this is no! Smart thermostats can still be used without WiFi, however, they’ll be deprived of some certain capabilities and innovative features that comes mainly due to their ability to connect to the internet. As a result, the smart thermostat will only be functional for basic task such as heating and cooling control. In other words, making use of a WiFi connection will be in your best bet to enjoy the multiple juicy benefits that comes with a smart thermostats such as remote monitoring, ability to connect to other devices and display local weather conditions and much more. And what’s the use of purchasing a smart thermostat if you’d not be able to enjoy these remarkable features?
However, even when you have a WiFi, it’s expected for the connection to fail at times. When this happens, what will be the impact on your smart thermostat? Let’s have a closer look!
• As you would have expected, when your smart thermostat is disconnected from WiFi, features that are controlled with the mobile app would all be impacted. And this might be a big headache when you wish to access these features and control remotely when far away from home.
• When your smart thermostat connection to WiFi fails, all live updates and alerts would be affected. This implies that you’d stop seeing updates, reports and notifications on your mobile device. As a result, you’ll not be notified in case of an emergency like electricity cut-outs, water leaks, humidity and temperatures exceeding the set levels as well as thermostat’s low battery.
• The lack of a WiFi connection might have taken away all the juicy advantages of having a smart thermostat, but one function that remains unaffected is the basic one - the control of your home’s heating and cooling system. In other words, if your smart thermostat is offline, your home will still be heated and cooled to the thermostat’s set temperature.
We can help you get more heating control system work with our qualified job leads and boost your business.
Join today