22 Mar
Building work | Wall Rendering
Tain - IV19
Enquiry from: Ian H
Start Date: Immediate
Property type: Detached, Work description: Lime rendering - harling Please contact to appoint
Are you trying to find Wall rendering in Tain? Our network of installers can assist with your job. Every one of our Builder in Tain are checked so you can see local customer reviews, when the business was started, ratings, satisfaction and day rate, enabling you to make the best choice on who to employ. Allow us take the headache out of finding up to 4 experts for your Wall rendering task.
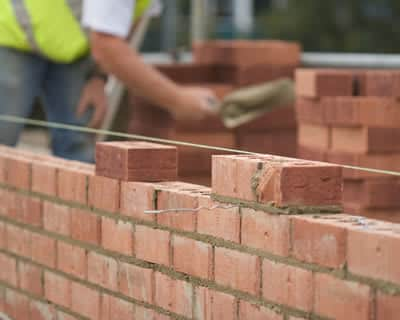
Wall surface Rendering look eye-catching as well as make a house look its ideal.
To make sure the continued protection of these walls, providing is frequently called for and also it's excellent at stopping climate damage to the brickwork. Without making, walls might just last in between 5 and also 10 years prior to they begin to deteriorate.
With wall rendering, not only do you make sure a framework's toughness, however the wall surfaces will certainly be more appealing as well and less complicated to repaint. Naturally, you'll have further defense against natural environments also.
And in today's world you do not need to wait up until the summertime to have actually wall surface rendering done. New advancements mean that the drying procedure is now much quicker.
Making your wall surfaces has never been cheaper and also expert attention won't cost a fortune. With improved life expectancy, the less costly rates make providing much more economical.
Getting Wall Rendering Quotes
We will offer as much as four Wall rendering pros locally, who will certainly use quotes for the job you desire done. You'll get a home visit from professionals in Tain who'll aid you to select the appropriate Wall rendering for your house before executing the setup. Enter your postal code to start looking currently.
The regular cost of Wall rendering is £5000. Costs vary based on the materials and the company chosen. The upper price range can be as high as £5750. The material costs are normally about £1250
| Avg. price low | Avg. price low |
|---|---|
| Avg. price | Avg. price |
| Avg. price high | Avg. price high |
£6300
£4725
£3150
£1575
£0
| Labour cost | £3,500 | |
| Material cost | £1,250 | |
| Waste removal | £250 |
Requests for quotations in Tain in March 2025
Requests for Wall rendering quotations in Tain in March 2025. 0% change from February 2025.
Requests for Wall rendering quotations in Highland in March 2025. 0% change from February 2025.
Tain is a royal burgh and also parish in the County of Ross, in the Highlands of Scotland. The name derives from the nearby River Tain, the name of which originates from an Indo-European origin meaning 'flow'. The Gaelic name, Baile Dubhthaich, means 'Duthac's town', after a neighborhood saint also referred to as Duthus. Tain was granted its first imperial charter in 1066, making it Scotland's oldest royal burgh, celebrated in 1966 with the opening of the Rose Garden by Queen Elizabeth, the Queen Mother. The 1066 charter, given by King Malcolm III, verified Tain as a shelter, where people can claim the protection of the church, and an immunity, in which citizen merchants as well as investors were exempt from specific tax obligations. These caused the advancement of the community. Little is known of earlier history although the community owed a lot of its significance to Duthac. He was a very early Christian number, perhaps 8th or 9th century, whose shrine had come to be so important by 1066 that it led to the royal charter. The ruined chapel near the mouth of the river was said to have been improved the site of his birth. Duthac came to be an official saint in 1419 as well as by the late Middle Ages his temple was a vital places of expedition in Scotland. King James IV came with least once a year throughout his regime to achieve both spiritual and political purposes. A leading landowning family of the area, the Clan Munro, offered political as well as spiritual figures to the town, including the dissenter Rev John Munro of Tain (passed away ca. 1630). The early Duthac Chapel was the centre of a shelter. Fugitives were by tradition given sanctuary in several square miles noted by limit rocks. During the First War of Scottish Independence, Robert the Bruce sent his wife as well as daughter to the shelter for safety. The refuge was gone against and they were captured by forces faithful to William II, Earl of Ross that handed them over to Edward I of England The women were taken to England as well as maintained prisoner for numerous years.
Tain - IV19
Enquiry from: Ian H
Start Date: Immediate
Property type: Detached, Work description: Lime rendering - harling Please contact to appoint
Answer a few quick questions, so we can match you with local builders who can help.
Get free, no-obligation local wall rendering quotes from 4 verified builders working in Tain.
Compare customer reviews, services and prices, and choose the right tradesperson for you.
Would highly recommend, they found me a firm which I was happy with a quote they give me and went ahead and had my job done within 2 days of enquiring.
Good easy way to find a selection of trades you need all in one place.
Love LeadsDoWork it's a big part of my Business I would recommend to anyone
If you’re considering rendering your house or property, then you’d most likely want to know whether or not applying for a planning permission will be needed. In several cases, planning permission will not be required for the maintenance, repair as well as replacement of the existing render on your building. These activities are covered by what’s called “Permitted Development Rights, which allows you to carry out some activities without having to apply for a planning permission but always subject to following some strict guidelines. For rendering, as long as the material (render) possesses an identical appearance to those existing on the house as well as same colour, then you will not require a planning permission. However, there are a number of projects that have been highlighted in which a planning permission would be required. These includes the following:
✓ Re-rendering in a colour that different from the original one used on the house or building.
✓ Rendering over brickwork which was not originally covered.
✓ Rendering over pebbledash
✓ Removing pebbledash and replacing it with render.
Another exception to the Permitted Development rights are for houses in conservation areas, national parks or areas of outstanding national beauty.
Although, you wouldn’t normally require to submit a planning application for approval before you apply render, but in truth it’s actually a bit of a grey area which isn’t totally clear and doesn’t allow for much freedom or creativity. And due to this fact, homeowners who wants an absolute peace of mind may opt to apply for planning permission just in case. It’s also worth noting that whether or not a planning permission is required, a huge rendering work will need to comply with building regulations which includes the need to insulate walls on the inside or outside as part of the work on several older properties .
Rendering of a house is one of those projects that can greatly improve the visual appeal of your home, enhance it’s energy efficiency, protect the brickwork from the elements and ultimately, add value to your home. Generally, the cost of rendering a house normally costs within the range of £25 to £70 per metre square, while the average cost house rendering costs stands at about £40 per square metre. Therefore, a 3 bedroom semi detached house will cost within the range of £4000 to about £5000.
The total cost of rendering a house is determined by a wide range of factors. These factors includes the following:
✓ Type of the rendering. There are three main types of rendering which includes sand and cement rendering, monocouche rendering as well as acrylic or silicone rendering. However, re-rendering applies to sand and cement sooner and it’ll also have to be painted every 3 to 6 years. Consequently, longer term cost can be higher when compared to the other types.
✓ Ease of access. Where your contractor will have to work around obstacles like shrubs or conservatory, this can make the cost a bit higher as it’ll take longer time to complete.
✓ Prep work. If the contractor needs to fill some cracks or perhaps an old mortar requires tuck pointing before rendering can be started, this will also affect the cost.
✓ Scaffolding. In the event whereby the job requires the use of scaffolding and you’ll have to hire one as a different cost, then the price will be higher.
✓ Your location. Due to the high standards of living and higher demands in areas like London or the Southeast, prices in these regions are usually higher than that of the other regions like Midlands and North.
Aside from the cold weather not being the most pleasant condition to work in, the winter weather can also cause a lot of problems for construction workers and even more so when you’re working with render. Poor weather conditions can generally cause a lot of harms on the final finish of a render. Below are some of the reasons why you should not consider rendering in a bad weather.
✓ Lime bloom. Render can be impacted by lime bloom as they are subjected to damp conditions and low temperatures while curing. This is due to the fact that cement are intolerant to slower drying conditions especially immediately affect its application.
✓ Top coats can be compromised. Coating are likely to get washed off before they’re even afforded the chance to set if drying conditions are low.
However, because its cold out there doesn’t necessarily imply that work must stop. It’s very possible to render during the winter months but to avoid potential pitfalls, we’ve got some tip that can be of great help. Let’s have a look!
✓ Check the weather forecast. Determine the drying and curing time and watch the forecast for the temperature dropping at night.
✓ Select the most suitable render. There are renders that are suitable for application in low temperatures to about 5℃ or even as low as 1℃. These types of render are fast setting which makes them perfect for the cold condition.
✓ Watch out for frost. Frost and render are enemies. Therefore, it won’t be wise to work with frosted materials, on frosted subtrates or apply below the recommended temperature that’s written on the product’s datasheet.
✓ Protect the finish. Make use of artificial enclosures around the scaffolding to battle adverse weather conditions.
Did you try rendering a wall but it doesn’t turn out the way you would have hoped for? Or perhaps you’ve been watching your wall render gradually deteriorate over time. Regard of your purpose, learning how to repair render cracks on wall is usually a great skill to have with your home maintenance in mind. However, whenever these crack are too large or difficult, we’d recommend you call in a reliable professional who can guarantee the best results for help. In this guide, we’re going to take you through the wall render repairing process. Let’s have a look!
No matter how solid a building material is, over time it’ll yield to the elements. When it comes to wall rendering it may be a case of too much sunshine or a costly mistake in the application process, but in truth, it cracks just because it cracks.
In order to repair render cracks, you’d have to start with a removal of damaged or cracked render. You’ll have to remove all the render or just a small section depending on the area you’re working on. If you’re able to clean all of the existing render as well as the paint over it all (both old and new), then removing a small section would work better as it makes it look neat and redone. Upon the removal of the existing render, the next important step would be to remove all loose material as well. Once done, you can then leave for up to 2 days to allow any trapped moisture to come out. Unfortunately, if the rains you’d have to wait till that dries too before you proceed.
Once dried, you can buy a pre-prepared render mix which already contains cement, lime and sand. Mix a 20kg bag with 4 litres of water (or check the product instructions and follow strictly), the mix to a fine consistency. Render is quick to dry, so you’d want to apply within 30 minutes of mixing. Make use of a trowel to apply the render on the affected spots and blend with the surrounding area.
We can help you get more wall rendering work with our qualified job leads and boost your business.
Join today