Stud Wall/Plasterboarding in Stromness

Get Stud Wall/Plasterboarding Prices in Stromness

Home > Plastering & Ceilings Projects > Plasterboard dry lining > Stromness

Stud Wall/Plasterboarding in Stromness

Internal or partition walls can be relocated or knocked through in your property, which can change the room design and establish a substantial open plan room design for a generous living area or a kitchen diner. When moving or knocking through internal walls, it is necessary to understand both the type of interior wall that it is, and whether it's a load bearing wall. Internal walls can be brick or block partitions, timber stud partitions, or even prefabricated wall panels. There are no shortcuts when it comes to deciding whether a wall is load bearing or not, it's always worth engaging the services of a structural engineer if you are unsure or can't view original plans for your premises. Load bearing walls can be moved, but this will often be more expensive and involves using additional load bearing solution, for example steel lintels. Moving or knocking through internal walls will generally consist of demolition of the existing wall, rebuilding or repairing the new walls, replastering and moving electrics. It may additionally demand alterations to the floor, as in some cases the floors between rooms may not be totally level, and knocking through internal walls can reveal this. Generally moving interior walls will not require planning permission, but you will need to conform to building regulations for insulation and sound proofing. Consulting a structural engineer will ensure that any interior wall changes that you intend on doing will keep your house structurally sound.

Average Plasterboard dry lining cost in Stromness

The average cost of Plasterboard dry lining is £850. Costs vary based upon the materials and the tradesman hired. The upper price range can be as high as £977.5. The material costs are in most cases around £212.5

Average price per Plasterboard dry lining job in 2025

Avg. price low

Avg. price low
£638

Avg. price

Avg. price
£850

Avg. price high

Avg. price high
£978

£1100

£825

£550

£275

£0

Prices based on actual Plasterboard dry lining costs for Stromness, as reported by local LeadsDoWork members.

Plasterboard dry lining installation cost in Stromness 2025

Labour cost £595
Material cost £213
Waste removal £43
Time frame: 1-2 days

Plasterboard dry lining searches in February 2025

Plasterboard dry lining Projects in Stromness in January 2025

90

Requests for quotations in Stromness in January 2025

0

Requests for Plasterboard dry lining quotations in Stromness in January 2025. 0% change from December 2024.

0

Requests for Plasterboard dry lining quotations in Orkney Islands in January 2025. 0% change from December 2024.

Source: Numbers calculated based on the search volumes in major search engines

Plasterboard dry lining searches in cities and towns near Stromness January 2025

Stromness

Stromness is the second-most populous town in Orkney, Scotland. It is in the southwestern part of Landmass Orkney. It is a burgh with a parish around the outdoors with the town of Stromness as its funding. A long-established seaport, Stromness has a population of around 2,190 homeowners. The old town is clustered along the characterful and also winding main road, flanked by homes and also shops constructed from regional rock, with slim lanes and streets branching off it. There is a ferryboat web link from Stromness to Scrabster on the north coast of mainland Scotland. First recorded as the site of an inn in the sixteenth century, Stromness came to be crucial during the late seventeenth century, when Great Britain went to battle with France and delivery was required to stay clear of the English Channel. Ships of the Hudson's Bay Company were regular site visitors, as were whaling fleets. Multitudes of Orkneymen, a lot of whom originated from the Stromness location, functioned as traders, travelers and also seafarers for both. Captain Cook's ships, Discovery as well as Resolution, called at the town in 1780 on their return trip from the Hawaiian Islands, where Captain Cook had been eliminated. Stromness Gallery mirrors these aspects of the town's history (showing for instance important collections of whaling antiques, and also Inuit artefacts revived as keepsakes by regional males from Greenland as well as Arctic Canada). An unusual aspect of the community's personality is the a great deal of structures embellished with display screens of whale bones outside them. At Stromness Pierhead is a celebratory statue by North Ronaldsay carver Ian Scott, revealed in 2013, of John Rae standing erect, with an engraving defining him as "the discoverer of the final link in the first navigable Northwest Passage".

Looking for Plasterboard dry lining in Stromness?

Get free quotes from local builders

Get free quotes

Local & reliable builders near me

Tell us about your plasterboard dry lining project

Answer a few quick questions, so we can match you with local builders who can help.

Find up to 4 builders in Stromness

Get free, no-obligation local plasterboard dry lining quotes from 4 verified builders working in Stromness.

Hire with confidence

Compare customer reviews, services and prices, and choose the right tradesperson for you.

Our reviews

Average

Would highly recommend

Would highly recommend, they found me a firm which I was happy with a quote they give me and went ahead and had my job done within 2 days of enquiring.

Good easy way to find a selection of…

Good easy way to find a selection of trades you need all in one place.

Love LeadsDoWork it's a big part of my …

Love LeadsDoWork it's a big part of my Business I would recommend to anyone

FAQs

How much plasterboard do I need?

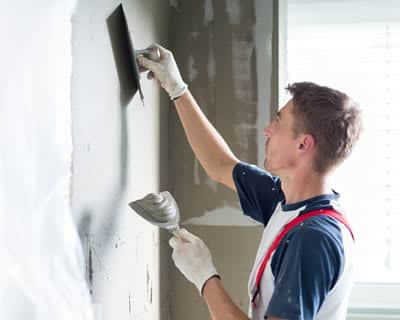
How Much Plasterboard Do I Need?

Although many people especially contractors have a tough time estimating the number of drywall or plasterboard needed to complete a project, it’s a rather simple task if all factors are taken into consideration. If you’re able to follow the same procedures taken by professionals to count dry wall sheets, you’ll be in the right direction. Let’s have a look at the procedures to follow!

lTake Square Footage Measurement

• Measure the square footage of the area where the plasterboard will be fitted.

• Multiply the height by the width of each wall or ceiling area.

• Add all quantities to obtain a total square-foot amount.

lCalculate Drywall Sheets

• To calculate the number of drywall or plasterboard sheet is very simple once you’ve gotten the total square footage.

• To get started, simply divide the total square footage of area by 32 (that’s if you are using a 4 by 8 sheets) or you can also make use of 48 to make the division (only if you’re making use of the 4 by 12 sheets).

• The answer you get after the division will give you the full number of plasterboard sheets that’s required to complete the project.

We’d recommend you include an extra 10 to 15 percent of whatever you calculate to take care of the possible odd cuts and wastages. This implies that if your total area is 1600 square feet while incorporating 4 by 8 sheets, simply divide 1600 by 32 which equals 50 sheets, now take 10% of 50 which equals 5, then add back the 5 extra to the 50 sheets earlier calculated to get 55 sheets. If you wish to estimate the cost, simply multiply the number of sheets gotten by the price per sheet. Do not forget to include delivery charges and local taxes.

How to dot and dab plasterboard?

How To Dot And Dab A Plasterboard

If you want a fast and simple way to achieve a smooth and sturdy wall which is decoration-ready, then dot and dab plasterboard is the way to go! It’s a relative simple process but can also be a bit challenging. Therefore, if you lack the necessary training or experience, hiring a professional would be a great step to protect your investment and guarantee the best results. Here, we’ll provide you with a deep insight into the plasterboard’s dot and dab procedures. Let’s have a look!

• At the thickness of the board with the adhesive, mark the ceiling and floor as well as the wall to indicate the centre of each board.

• Ensure the wall’s height is 15mm more than the plasterboard

• Make a mixture of the adhesive and achieve a thick consistency. Apply a consistent layer of the mixture around the wall’s perimeter, edge of the ceiling and any other openings with the use of a trowel.

• Select dabs that are about 250mm long and 50mm to 75mm wide and apply the adhesive in them. Make use of 3 vertical rows for individual boards. Also ensure to apply, at skirting level, a band of adhesive.

• Position the board’s reverse side against the dabs, and laying against the packers. Then make the board align with the ceiling and floor marks with the help of a straight edge.

• Raise the board till its tight against the ceiling with a board lifter. Once done, use the plasterboard to wedge the board into place before you remove the board lifter.

• Repeat the same process for the remaining parts of the room. Once completed, make sure the adhesive is set before you remove the boards.

How to put up plasterboard?

How To Put Up Plasterboard

Putting up a plasterboard is a vital process when it comes to home renovations. However as daunting as it may seem, with a good guide and regular practice you can master the skill within a small period of time. If you lack proper training and experience, we’d recommend you hire a seasoned professional plasterer for help so as to get the best result and also avoid additional costs due to possible damages.

Putting up plasterboard is way quicker than wet plastering and also significantly reduces the drying time that can slow down your renovation plans. With a plasterboard, you can delve straight into the decorating stage and achieve a smooth finish. Below are the steps required to put up a plasterboard.

• The first step is cutting the plasterboard to shape which be one of the most challenging parts of the process. This is because you’ll need to fit the board around things such as plug sockets and window sills. As a result, this involves cutting complex shapes rather than just a simple straight line. To get this done, simply mark out the cut required with the use of a tape measure, combination square and spirit level for a better precision. Once done, you can then use a plasterboard pad saw to cut along the marked spots.

• After you made the required cuts, the next step is putting up the plasterboard. And depending on where the boards are going to be put, this could be a very challenging task. If you’re going to put the boards on the ceiling or somewhere very high up, you’d probably need an extra pair of hands for help. To get this done, use the appropriate screws to secure the boards in place if you’re installing them directly on studs. However, if you’d be fixing them onto bricks or blocks, a drywall adhesive is your best bet.

How to fit plasterboard?

How To Fit Plasterboard

If you’re planning to renovate your house, then here is a must-read guide! Fitting of plasterboard is a crucial step when it comes to renovation. If you’re bringing down an existing lath and plaster for an upgraded surface or adding a new wall, a plasterboard is required for your project to be a true success. If you’re a novice with no prior practice or experience, you can protect your investment by hiring the services of a professional plasterer to guarantee the best results, the first time. However, we’ve put together this guide to give you an insight on how the plasterboard fitting process is done.

To get started, you’ll need a power drill, hammer, plasterboard nails or screws, broad knife, utility knife, measurement tape, pencil, ladder as well as a joint tape.

Before proceeding, you need to identify the number of plasterboard sheets needed to commence the project by measuring the height and width of the wall as well as calculating the square footage. If you possess a stud timber wall, the steps below will get you the best results.

• Measure the walls and mark the plasterboard where you’ll make the cuts. Start with a full sheet and cut pieces down in such a way that would fit

• Score the front paper of the plasterboard with utility knife. Fold the sheet to get a clean cut through the board and make use of the knife to the remaining paper.

• Place the first sheet against the wall and use an offcut to prevent the plasterboard from touch the floor.

• Make the plasterboard rest snugly against the wall in position and screw it firmly on each stud. Once done, fasten it at all the sheets’ edges and in a line down the stud to make for a firm connection. Follow the same process for the remaining plasterboard sheet till the wall is fully covered.

Placholder Image

Other Top Projects in Stromness

Customer Reviews

Overall rating:


Stromness Plasterboard dry lining installers are rated 0 out of 5 based on 0 reviews of 0 pros.
The LeadsDoWork rating and review is an overall rating based on verified reviews and feedback from the customers with Plasterboard dry lining projects that have been connected with Plasterboard dry lining pros to help them. All Plasterboard dry lining contractors All Stromness Plasterboard dry lining contractors

Are you a builder in Stromness?

We can help you get more plasterboard dry lining work with our qualified job leads and boost your business.

Join today