03 Jul
Interior work | Stud Walls
London - N4
Enquiry from: Neville F
Start Date: Immediate
fitting a false ceiling in a small bedroom
Internal or partition walls can be relocated or knocked through in your property, which can adjust the area layout and create a larger open plan room design for a generous living area or a kitchen diner. When relocating or knocking through interior walls, it is vital to understand both the kind of internal wall that it is, and whether it's a load bearing wall. Internal walls can be brick or block partitions, timber stud partitions, or even prefabricated wall panels. There are no shortcuts when it comes to ascertaining whether a wall is load bearing or not, it's always worth engaging the services of a structural engineer if you are unclear or can't view original plans for your property. Load bearing walls can be moved, but this is generally more expensive and involves installing additional load bearing solution, such as steel lintels. Moving or knocking through internal walls will generally consist of demolition of the pre-existing wall, replacing or restoring the new walls, replastering and moving electrics. It may additionally necessitate alterations to the floor, as in some cases the floors between rooms aren't entirely level, and knocking through interior walls can reveal this. Generally moving interior walls will not require planning permission, but you'll need to adhere to building regulations for insulation and sound proofing. Consulting a structural engineer will ensure that any interior wall changes that you intend on doing will keep your property structurally sound.
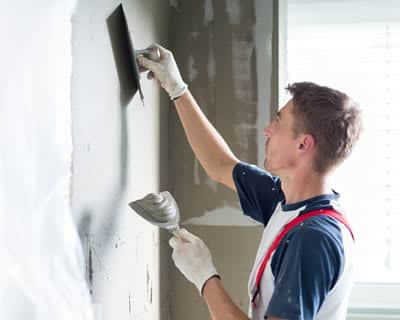
The average cost of Plasterboard dry lining is £850. Costs vary based upon the materials and the tradesman hired. The upper price range can be as high as £977.5. The material costs are in most cases around £212.5
| Avg. price low | Avg. price low |
|---|---|
| Avg. price | Avg. price |
| Avg. price high | Avg. price high |
£1100
£825
£550
£275
£0
| Labour cost | £595 | |
| Material cost | £213 | |
| Waste removal | £43 |
Requests for quotations in Haringey in March 2025
Requests for Plasterboard dry lining quotations in Haringey in March 2025. 0% change from February 2025.
Requests for Plasterboard dry lining quotations in London County in March 2025. 0% change from February 2025.
The London Borough of Haringey is a London borough in North London, classified by some definitions as a part of Inner London, and by others as part of Outer London. It was established in 1965 by the amalgamation of three former boroughs. It shares borders with six other London boroughs. Clockwise from the north, they are: Enfield, Waltham Forest, Hackney, Islington, Camden, and Barnet. Haringey covers an area in excess of 11 square miles (28.5 km2). The local authority is Haringey London Borough Council.
In line with population estimates from the middle of 2014, Haringey includes a permanent population of around 267541 individuals. There are about 97101 homes in Haringey. Of these, 46 per cent are owner occupied. The borough is characterised by some intense contrasts. Locations in the west, such as Highgate, Muswell Hill and Crouch End are amongst the most prosperous in the country. Within the east of the borough, however, some wards are classified as being amongst the most deprived ten per cent inside the nation.
Haringey is also a borough of contrasts geographically. The borough consists of big locations of green space, which make up more than 25 per cent of its total area. Some of the more familiar nearby landmarks include Alexandra Palace, Bruce Castle, Jacksons Lane, Highpoint I and II, and Tottenham Hotspur Football Club.
London - N4
Enquiry from: Neville F
Start Date: Immediate
fitting a false ceiling in a small bedroom
Watford - WD17
Enquiry from: Trevor A
Start Date: Immediate
To build a stud wall with a doorway with an arch Wall approx 10ft wide x 8 ft high
Hayes - UB4
Enquiry from: Waleed C
Start Date: Immediate
Stud wall partition with door cutout
Watford - WD18
Enquiry from: Dario M
Start Date: Immediate
we would like a stud wall to be erected between living and dining room. the rooms were previously separated by a wall which was removed. the original door to the living room was closed off, and we wou...
Answer a few quick questions, so we can match you with local builders who can help.
Get free, no-obligation local plasterboard dry lining quotes from 4 verified builders working in Haringey.
Compare customer reviews, services and prices, and choose the right tradesperson for you.
Would highly recommend, they found me a firm which I was happy with a quote they give me and went ahead and had my job done within 2 days of enquiring.
Good easy way to find a selection of trades you need all in one place.
Love LeadsDoWork it's a big part of my Business I would recommend to anyone
How Much Plasterboard Do I Need?
Although many people especially contractors have a tough time estimating the number of drywall or plasterboard needed to complete a project, it’s a rather simple task if all factors are taken into consideration. If you’re able to follow the same procedures taken by professionals to count dry wall sheets, you’ll be in the right direction. Let’s have a look at the procedures to follow!
lTake Square Footage Measurement
• Measure the square footage of the area where the plasterboard will be fitted.
• Multiply the height by the width of each wall or ceiling area.
• Add all quantities to obtain a total square-foot amount.
lCalculate Drywall Sheets
• To calculate the number of drywall or plasterboard sheet is very simple once you’ve gotten the total square footage.
• To get started, simply divide the total square footage of area by 32 (that’s if you are using a 4 by 8 sheets) or you can also make use of 48 to make the division (only if you’re making use of the 4 by 12 sheets).
• The answer you get after the division will give you the full number of plasterboard sheets that’s required to complete the project.
We’d recommend you include an extra 10 to 15 percent of whatever you calculate to take care of the possible odd cuts and wastages. This implies that if your total area is 1600 square feet while incorporating 4 by 8 sheets, simply divide 1600 by 32 which equals 50 sheets, now take 10% of 50 which equals 5, then add back the 5 extra to the 50 sheets earlier calculated to get 55 sheets. If you wish to estimate the cost, simply multiply the number of sheets gotten by the price per sheet. Do not forget to include delivery charges and local taxes.
How Much Is Plasterboard?
Do you wish to install plasterboard in the nearest future? If yes, then you’d probably want to know the amount it’s going to cost. Here, we’ll give you a detailed plasterboarding prices breakdown to help you calculate an estimate for your project.
A plasterboarding project including the cost of both materials and labour with the use of a high quality panels is about £4 to £5 per panel. Therefore, if you wish to calculate on the basis of a standard room about 12x12ft would cost about £500 to £600. However, this price can fluctuate significantly depending on the professional as well as the quality of the materials you wish to incorporate in completing the project. We’d recommend that you hire the services of a professional with accreditation as he would provide you with a detailed quote with no hidden charges or costs. To give you a clearer idea, we’ve taken the time out to put together some estimated costs of employing the services of a seasoned professional plasterer to supply and plasterboard your home or office. Let’s take a look!
• A 6 x 12ft room with panels and plasterboard should have an average cost within the range of £250 to £400 and duration of one to two days.
• The individual cost of plasterboarding or drywalling a standard 12 x 12ft room should have an average cost within the range of £500 to £600 and duration of one to three days. These includes 60% for materials used (£330), 30% for tradespersons (£165) and the remaining 10% for waste removal (£55) to give a total cost of £550.
• A 12 x 24ft room with panels and plasterboard should have an average cost within the range of £1000 to £1200 and duration of three to six days.
How To Plasterboard A Brick Wall
Do you want to cover your brick wall with plasterboard? The key to success here is the preparation. You must ensure that brick wall is prepared well enough to receive the plasterboard. To get started, there’s the need to attach wood furring strips to the wall which serves as studs in a wood frame structure. This way, the plasterboard will be prevented from getting in touch with the brick. You can always hang pictures or any other forms of decoration in between the gap between the walls. Let’s have a look!
lAttach Furring Strips
• Get a 2 inch by 4 inch wood stud and apply a bead of construction adhesive.
• Using a masonry bit, drill a pilot hole through the wood stud’s base as well as the brick wall.
• Hit a 3 inch fluted nail through the hole using a sledgehammer
• Using a construction adhesive, bind a horizontal 2 inch by 3 inch stud to the upper edge of the wall.
• Using an adhesive, bind the length of a 2 inch by 3 inch stud on its wide side.
• Use a masonry drill to drill a hole on the wood stud and 1 1/2 inches into the brick wall.
• Hit a 3 inch fluted nail through the pilot hole.
lApply Plasterboard
• Hold a plasterboard sheet against the furring strips.
• Use plasterboard screw to hold the drywall sheets in place.
• Use fibreglass to cover the joints where the two plasterboard sheets meet.
• Use a thin layer of the joint compound on the tape. Once done, screw it using a 6 inch taping knife, then allow to dry overnight.
• Use a sandpaper to smooth the joint compound.
• Use a fresh coat of the joint compound to block the holes and joints. Once done, allow the compound to dry.
• Use a light sandpaper to smooth the final coat.
Plasterboarding a brick wall is a simple task but the preparation part must be done right to protect your investment. Therefore, we’d recommend you hire the services of a skilful professional, who can guarantee the best results especially if you lack enough training and experience to carry out a DIY project.
How To Dot And Dab A Plasterboard
If you want a fast and simple way to achieve a smooth and sturdy wall which is decoration-ready, then dot and dab plasterboard is the way to go! It’s a relative simple process but can also be a bit challenging. Therefore, if you lack the necessary training or experience, hiring a professional would be a great step to protect your investment and guarantee the best results. Here, we’ll provide you with a deep insight into the plasterboard’s dot and dab procedures. Let’s have a look!
• At the thickness of the board with the adhesive, mark the ceiling and floor as well as the wall to indicate the centre of each board.
• Ensure the wall’s height is 15mm more than the plasterboard
• Make a mixture of the adhesive and achieve a thick consistency. Apply a consistent layer of the mixture around the wall’s perimeter, edge of the ceiling and any other openings with the use of a trowel.
• Select dabs that are about 250mm long and 50mm to 75mm wide and apply the adhesive in them. Make use of 3 vertical rows for individual boards. Also ensure to apply, at skirting level, a band of adhesive.
• Position the board’s reverse side against the dabs, and laying against the packers. Then make the board align with the ceiling and floor marks with the help of a straight edge.
• Raise the board till its tight against the ceiling with a board lifter. Once done, use the plasterboard to wedge the board into place before you remove the board lifter.
• Repeat the same process for the remaining parts of the room. Once completed, make sure the adhesive is set before you remove the boards.
We can help you get more plasterboard dry lining work with our qualified job leads and boost your business.
Join today