Stud Wall/Plasterboarding in Bakewell

Get Stud Wall/Plasterboarding Prices in Bakewell

Home > Plastering & Ceilings Projects > Plasterboard dry lining > Bakewell

Stud Wall/Plasterboarding in Bakewell

Internal or partition walls can be moved or knocked through in your house, which can adjust the area layout and establish a larger open plan room design for a ample living space or a kitchen diner. When moving or knocking through interior walls, it is vital to understand both the kind of internal wall that it is, and whether or not it's a load bearing wall. Internal walls can be brick or block partitions, timber stud partitions, or even prefabricated wall panels. There are no shortcuts when it comes to deciding whether a wall is load bearing or not, it is advisable to engage the services of a structural engineer if you are not sure or can't view original plans for your premises. Load bearing walls can be moved, but this may also be more expensive and involves adding additional load bearing methods, like steel lintels. Moving or knocking through internal walls will often involve demolition of the existing wall, rebuilding or repairing the new walls, replastering and moving electrics. It may also demand adjustments to the floor, as in some cases the floors between rooms aren't totally level, and knocking through internal walls can expose this. Generally moving internal walls will not require planning permission, but you'll need to adhere to building regulations for insulation and sound proofing. Consulting a structural engineer will ensure that any internal wall changes that you plan on doing will keep your home structurally sound.

Average Plasterboard dry lining cost in Bakewell

The average cost of Plasterboard dry lining is £850. Costs vary based upon the materials and the tradesman hired. The upper price range can be as high as £977.5. The material costs are in most cases around £212.5

Average price per Plasterboard dry lining job in 2025

Avg. price low

Avg. price low
£638

Avg. price

Avg. price
£850

Avg. price high

Avg. price high
£978

£1100

£825

£550

£275

£0

Prices based on actual Plasterboard dry lining costs for Bakewell, as reported by local LeadsDoWork members.

Plasterboard dry lining installation cost in Bakewell 2025

Labour cost £595
Material cost £213
Waste removal £43
Time frame: 1-2 days

Plasterboard dry lining searches in April 2025

Plasterboard dry lining Projects in Bakewell in March 2025

447

Requests for quotations in Bakewell in March 2025

0

Requests for Plasterboard dry lining quotations in Bakewell in March 2025. 0% change from February 2025.

0

Requests for Plasterboard dry lining quotations in Derbyshire in March 2025. 0% change from February 2025.

Source: Numbers calculated based on the search volumes in major search engines

Plasterboard dry lining searches in cities and towns near Bakewell March 2025

Bakewell

Bakewell is a tiny market town and also civil parish in the Derbyshire Dales district of Derbyshire, England, understood for a local confection, Bakewell pudding. It pushes the River Wye, concerning 13 miles (21 km) south-west of Sheffield. In the 2011 census the civil parish of Bakewell had a population of 3,949. The community is close to the tourist destinations of Chatsworth House as well as Haddon Hall. Although there is proof of earlier negotiations in the area, Bakewell itself was possibly established in Anglo Saxon times, when Bakewell remained in the Anglian kingdom of Mercia. The name Bakewell implies a spring or stream of a male called Badeca (or Beadeca) and derives from this personal name plus the Old English wella. In 949 it was Badecanwelle and also in the 11th century Domesday Book it was Badequelle. Bakewell Church Church, a Grade I noted structure, was founded in 920 as well as has a 9th-century cross in the churchyard. The present church was created in the 12th-- 13th centuries however was essentially rebuilt in the 1840s by William Flockton. By Norman times Bakewell had actually gotten some value: the community and its church (having two priests) are pointed out in the Domesday Book and also a motte as well as bailey castle was constructed in the 12th century. In the very early 14th-century, the vicar was terrorised by the Coterel gang, that evicted him as well as seized the church's cash at the instigation of the canons of Lichfield Cathedral. A market was established in 1254 and also Bakewell established as a trading centre. The Grade I-listed five-arched bridge over the River Wye was constructed in the 13th century as well as is among the few enduring residues of that period. An additional Grade I-listed bridge, Holme Bridge, was constructed in 1664 and goes across the Wye on the north-eastern outskirts of the community. A chalybeate springtime was discovered and a bath residence built in 1697. This resulted in an 18th-century quote to create Bakewell as a health spa town in the manner of Buxton. Building of Lumford Mill by Richard Arkwright in 1777 was followed by the restoring of much of the town in the 19th century.

Looking for Plasterboard dry lining in Bakewell?

Get free quotes from local builders

Get free quotes

Local & reliable builders near me

Tell us about your plasterboard dry lining project

Answer a few quick questions, so we can match you with local builders who can help.

Find up to 4 builders in Bakewell

Get free, no-obligation local plasterboard dry lining quotes from 4 verified builders working in Bakewell.

Hire with confidence

Compare customer reviews, services and prices, and choose the right tradesperson for you.

Our reviews

Average

Would highly recommend

Would highly recommend, they found me a firm which I was happy with a quote they give me and went ahead and had my job done within 2 days of enquiring.

Good easy way to find a selection of…

Good easy way to find a selection of trades you need all in one place.

Love LeadsDoWork it's a big part of my …

Love LeadsDoWork it's a big part of my Business I would recommend to anyone

FAQs

How to put up plasterboard?

How To Put Up Plasterboard

Putting up a plasterboard is a vital process when it comes to home renovations. However as daunting as it may seem, with a good guide and regular practice you can master the skill within a small period of time. If you lack proper training and experience, we’d recommend you hire a seasoned professional plasterer for help so as to get the best result and also avoid additional costs due to possible damages.

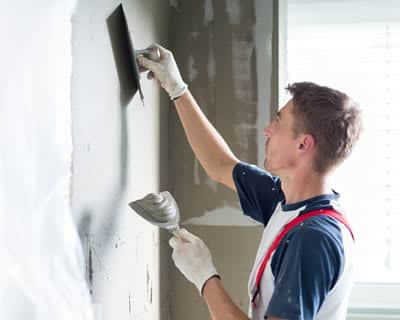
Putting up plasterboard is way quicker than wet plastering and also significantly reduces the drying time that can slow down your renovation plans. With a plasterboard, you can delve straight into the decorating stage and achieve a smooth finish. Below are the steps required to put up a plasterboard.

• The first step is cutting the plasterboard to shape which be one of the most challenging parts of the process. This is because you’ll need to fit the board around things such as plug sockets and window sills. As a result, this involves cutting complex shapes rather than just a simple straight line. To get this done, simply mark out the cut required with the use of a tape measure, combination square and spirit level for a better precision. Once done, you can then use a plasterboard pad saw to cut along the marked spots.

• After you made the required cuts, the next step is putting up the plasterboard. And depending on where the boards are going to be put, this could be a very challenging task. If you’re going to put the boards on the ceiling or somewhere very high up, you’d probably need an extra pair of hands for help. To get this done, use the appropriate screws to secure the boards in place if you’re installing them directly on studs. However, if you’d be fixing them onto bricks or blocks, a drywall adhesive is your best bet.

How to dot and dab plasterboard?

How To Dot And Dab A Plasterboard

If you want a fast and simple way to achieve a smooth and sturdy wall which is decoration-ready, then dot and dab plasterboard is the way to go! It’s a relative simple process but can also be a bit challenging. Therefore, if you lack the necessary training or experience, hiring a professional would be a great step to protect your investment and guarantee the best results. Here, we’ll provide you with a deep insight into the plasterboard’s dot and dab procedures. Let’s have a look!

• At the thickness of the board with the adhesive, mark the ceiling and floor as well as the wall to indicate the centre of each board.

• Ensure the wall’s height is 15mm more than the plasterboard

• Make a mixture of the adhesive and achieve a thick consistency. Apply a consistent layer of the mixture around the wall’s perimeter, edge of the ceiling and any other openings with the use of a trowel.

• Select dabs that are about 250mm long and 50mm to 75mm wide and apply the adhesive in them. Make use of 3 vertical rows for individual boards. Also ensure to apply, at skirting level, a band of adhesive.

• Position the board’s reverse side against the dabs, and laying against the packers. Then make the board align with the ceiling and floor marks with the help of a straight edge.

• Raise the board till its tight against the ceiling with a board lifter. Once done, use the plasterboard to wedge the board into place before you remove the board lifter.

• Repeat the same process for the remaining parts of the room. Once completed, make sure the adhesive is set before you remove the boards.

What is plasterboard?

What Is Plasterboard?

The plasterboard is unarguably one of the most common building materials across the globe. Sometimes referred to as gypsum board, gyprock, drywall or wall board, the plasterboard is mostly incorporated for ceiling cladding and interior walls in several homes and offices in recent times. However, despite its global acceptability, it’s a very misunderstood building material.

The plasterboard is manufactured using a gypsum core with a heavy paper covering both sides of the sheet. The measurement of a standard plasterboard sheet is a length of 2.4 metres in and a width of 1.2 metres, with a thickness of about 13mm. The board usually have either a bevelled or a bit flat edge. The bevelled edge makes it easy for the installers to use a plaster to smooth out the surface after nailing the sheets to walls and ceilings as well as taping the edges.

The plasterboard comes in different types. Although various manufacturers provide a unique name for their products, but they’re all included in one of the following categories:

• Water Resistant Plasterboard - This type of plasterboard are best suited to be used in water areas like bathroom, laundry rooms and kitchens.

• Acoustic Plasterboard - Due to its sounding proofing qualities, this type of plasterboard is preferred to be used in home theatres or noisy areas.

• Flexible Plasterboard - This is to be incorporated on curvy surfaces.

• Fire Resistant Plasterboard - Just like the name implies, this type of plasterboard is best suited for use in high fire hazard areas.

If you’re about to kick start some small renovations around your house or office, using a plasterboard to clad your walls is a very simple and worthwhile task. However, if you want to do major renovations or need to apply plasterboard to your ceiling, the best option would be to leave it to a seasoned professional.

How to fit plasterboard?

How To Fit Plasterboard

If you’re planning to renovate your house, then here is a must-read guide! Fitting of plasterboard is a crucial step when it comes to renovation. If you’re bringing down an existing lath and plaster for an upgraded surface or adding a new wall, a plasterboard is required for your project to be a true success. If you’re a novice with no prior practice or experience, you can protect your investment by hiring the services of a professional plasterer to guarantee the best results, the first time. However, we’ve put together this guide to give you an insight on how the plasterboard fitting process is done.

To get started, you’ll need a power drill, hammer, plasterboard nails or screws, broad knife, utility knife, measurement tape, pencil, ladder as well as a joint tape.

Before proceeding, you need to identify the number of plasterboard sheets needed to commence the project by measuring the height and width of the wall as well as calculating the square footage. If you possess a stud timber wall, the steps below will get you the best results.

• Measure the walls and mark the plasterboard where you’ll make the cuts. Start with a full sheet and cut pieces down in such a way that would fit

• Score the front paper of the plasterboard with utility knife. Fold the sheet to get a clean cut through the board and make use of the knife to the remaining paper.

• Place the first sheet against the wall and use an offcut to prevent the plasterboard from touch the floor.

• Make the plasterboard rest snugly against the wall in position and screw it firmly on each stud. Once done, fasten it at all the sheets’ edges and in a line down the stud to make for a firm connection. Follow the same process for the remaining plasterboard sheet till the wall is fully covered.

Placholder Image

Other Top Projects in Bakewell

Customer Reviews

Overall rating:


Bakewell Plasterboard dry lining installers are rated 4.7 out of 5 based on 2 reviews of 43 pros.
The LeadsDoWork rating and review is an overall rating based on verified reviews and feedback from the customers with Plasterboard dry lining projects that have been connected with Plasterboard dry lining pros to help them. All Plasterboard dry lining contractors All Bakewell Plasterboard dry lining contractors

Are you a builder in Bakewell?

We can help you get more plasterboard dry lining work with our qualified job leads and boost your business.

Join today