Cape Decorators
Based: in Glasgow, G71 8NULatest review
Elizabeth S., PA1
Painter | Interior in Paisley
Work starts on the 13th Feb 2018, However with the speed of contact and personal visit, I feel very confident I have cho...
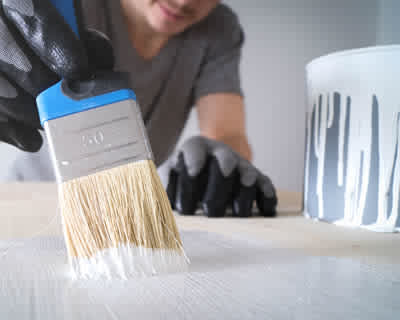
Interior painting can be a really economical means to brighten up the interior of your property. Painting is often accomplished as a DIY project, but experienced painters and decorators can assure a great appearance and guarantee that your redecorating will last as long as possible.
The key to effective painting is preparation. Carefully opt for a paint colour or consider applying two shades to create an accent wall. Additionally take into consideration the finish, as paints will come in a range of finishes for instance, gloss, satin, egg shell or matte. Gloss and satin will be more durable in high traffic spaces. There is a huge assortment of suppliers and paints available so make sure to search around to get the paint that's perfect for your room.
Interior painters and decorators can supply you with lots of recommendations about paint and help you choose the perfect colour scheme for your interior spaces.
The average cost of a Painting and decorating is £800. Costs vary based upon the materials and the contractor chosen. The upper price range can be as high as £920. The material costs are mainly around £200
| Avg. price low | Avg. price low |
|---|---|
| Avg. price | Avg. price |
| Avg. price high | Avg. price high |
£1100
£825
£550
£275
£0
| Labour cost | £560 | |
| Material cost | £200 | |
| Waste removal | £40 |
Requests for quotations in Isle Of Coll in March 2025
Requests for Painting and decorating quotations in Isle Of Coll in March 2025. 0% change from February 2025.
Requests for Painting and decorating quotations in Inner Hebrides in March 2025. -100% change from February 2025.
Requests for quotations in Greenock in March 2025
Requests for quotations in Paisley in March 2025
Requests for quotations in Gourock in March 2025
Requests for quotations in Port Glasgow in March 2025
Requests for quotations in Erskine in March 2025
Coll is an island located west of the Isle of Mull in the Inner Hebrides of Scotland. Coll is recognized for its sandy coastlines, which rise to create huge sand dunes, for its corncrakes, as well as for Breacachadh Castle. It remains in the council location of Argyll and Bute. Coll is about 13 miles (20 km) long by 3 miles (5 kilometres) wide and has a population of around 150. Coll's sandy beaches rise to develop big dune. The acme on Coll is Ben Hogh in the mid west of the island, a ridge with two tops running NW/SE, which climbs originally to a height of 104 metres (341 feet) with a triangulation pillar, and to 106 metres (348 feet) 450 metres (492 yd) to the southeast. In the 2011 census, the island's population was recorded as 195, representing an increase over the previous decade of virtually 19%.
Work starts on the 13th Feb 2018, However with the speed of contact and personal visit, I feel very confident I have cho...
Answer a few quick questions, so we can match you with local decorators who can help.
Get free, no-obligation local painting and decorating quotes from 4 verified decorators working in Isle Of Coll.
Compare customer reviews, services and prices, and choose the right tradesperson for you.
Would highly recommend, they found me a firm which I was happy with a quote they give me and went ahead and had my job done within 2 days of enquiring.
Good easy way to find a selection of trades you need all in one place.
Love LeadsDoWork it's a big part of my Business I would recommend to anyone
What Insurance Does A Painter Need?
As a painter, you’re most likely going to require three forms of insurance which includes public liability, income protection as well as tool insurance. However, you should take note that outside these three, there are also several other forms of insurance whose relevance will only be determined by the nature of your business. Now let’s take a closer look into the three most important forms of insurance for painters.
✓ Public liability. What’s surprising here is the fact that many painters are actually aware that they should have a public liability insurance, but only a few really knows what it actually covers. Essentially, what a public liability insurance does is to protect you in the event whereby you messed up and some else suffers a loss as a result of your actions. Third parties can suffer a property damage or personal injury as a result of your negligence. It does not in any way cover the damages to your own property or injuries suffered by you or your staff.
✓ Income protection. As a subcontractor or self employed painter, you’ll be in the best position to know that if you don’t work, there’ll be no money for you. And with no sick leave and possibly no workers’ compensation, then financial problem looms. But not to worry, you can protect yourself from this risk by getting an income protection insurance.
✓ Tool insurance. It’s always a terrible feeling when you go to the site only to discover your tools such as ladders, spray guns, trestles and equipment are suddenly no where to be found. Upon discovery of this situation, you’ll start thinking about the cost of replacing all the tools. With a tool insurance, you can be protected against these sort of situations whereby your tools are stolen, damaged and lots more.
How To Paint A Radiator
First thing you should know about painting a radiator is that normal paints can’t be used to do the job, however that doesn’t mean it’s not cheap, easy and fun - it definitely is and even more so, when you do it the right way. With a few radiator painting hints here, it’s only a matter of time before you start painting your radiators every colour of the rainbow delightfully.
Painting a radiator is not one of the most common tasks on most people’s to do list, so we’ve created this article as an encouraging nudge to allow more people let their creativity manifest through a brush. However, this is not to say that this is a task for everyone though as you won’t like to make a mess of your radiator. If you know you can’t pick up a brush or bend a knee or your back here and there, then you probably shouldn’t. In such cases, hiring a professional painter would be your best bet to get the best results while also saving yourself some time and money.
To paint a radiator, you’ll need a paint brush, suitable radiator paint, dust sheet and a radiator paint brush (optional).
✓ Turn off the radiator and leave it to cool off. Once it’s cold, simply wipe out all dust, dirt or grease from the radiator.
✓ Protect the flooring under the radiator from any paint splatter with a by spreading out a dust cloth.
✓ Use a suitable radiator paint to brush out well and lay off evenly in a direction. Leave it to dry overnight. Then apply paint on the radiator in direction of the grooves with the help of a top quality brush.
✓ Paint in sections and move across the radiator slightly overlapping until you get to the end. The move to paint the other areas.
✓ Leave the paint to dry as instructed in the manufacturer’s instructions, then apply a second coat if necessary.
How To Paint Skirting Boards
In the exact same way a room isn’t complete unless it has all the right finishing touches here and there, your skirting boards also just wouldn’t be right leaving it without a paint. As you can imagine, skirting board can quickly gather dust, dirt and scuffed over time can affect the appearance of the entire room. But you don’t have to wait for this to happen before painting your skirting boards. Good news is, painting of skirting boards is relatively easy and straightforward especially when you follow the guide given in this article. It should, however, be said that if you’re not so confident about holding a brush and doing the task yourself, then getting a professional painter to complete the project will be a great option to achieve the best result while you can focus on other important things.
Painting your skirting board will help provide your room with the much needed perfect frame. Now let’s take a closer look!
✓ Prepare your skirting boards. Treat your wood skirting board with a knotting solution and wood primer. But if they’re already painted or varnished, simply wipe clean use a wet and dry paper with a mild detergent to abrade the surface. Once done, you can then run a strip of masking tape along the floor.
✓ Start Painting. For the decorative coat, you can use any paint designed for wood and metal like satin, gloss etc. Once selected, you can then start to paint across the top with the help of a 2 inch brush. Then move to the flat side. Work in easy to manage sections and when starting the next section, start at the far side and brush into the section you’ve just painted so as to make for an even finish. Finally, remove the masking tape used before the paint dries off.
How To Paint A Ceiling
If you’re a bit hesitant to take on the seemingly awkward task of painting your ceiling, you’re definitely not alone. However, there are ways in which you can make ceiling painting tasks one of the less strenuous tasks you’ll find around the house as they’ll help you get rid of most drips and also assist you to easily determine whether or not you’re covering the whole ceiling. In several cases, painting a ceiling simply means painting it white again and most same colour painting jobs are way easier than painting with a new colour entirely. When you have the right size of nap controller as well as the appropriate length of an extension pole, painting over your head will be a lot easier. Here’s how to paint a ceiling.
✓ Prepare the room. This include removing as many furniture and objects from the room as possible while also laying down plastic sheets on the remaining ones. And also cover the floor with paper or canvas drop cloths.
✓ Remove obstructions. Detach or remove everything that can make your work harder like light fixtures or smoke detectors.
✓ Protect surfaces. This includes protecting vertical surfaces like the windows and doors from ceiling paint.
✓ Prepare the ceiling. This involves vacuuming the ceiling to get rid of any dust or dirt, sanding any rough spots on the ceiling with a sandpaper and filling any small holes or cracks in the ceiling (optional).
✓ Prime the ceiling. Use an angled brush or paint edging tool or primer to cut in edges of the ceiling.
✓ Paint the edges of the ceiling. When the primer has dried, simply paint the edges of the ceiling to create a frame in which you can easily work in.
✓ Paint the ceiling in grids.
We can help you get more painting and decorating work with our qualified job leads and boost your business.
Join today